Phones have become an indispensable part of our daily lives. Yet, with constant use, they are often vulnerable to accidents, resulting in cracks and scratches that detract from both their functionality and aesthetics. Promptly addressing these issues can not only prolong the life of your device but also enhance your overall user experience. While many may choose to replace their devices due to a cracked screen, there exist various materials and techniques available that empower you to tackle this problem yourself. In this guide, we will explore the essential tools and methods necessary to effectively fill in those unsightly cracks, ensuring your phone remains as good as new. So, let’s dive into the world of DIY phone screen repair.
When it comes to repairing a cracked phone screen, the right materials are crucial. This initial step can determine the success of your efforts and the durability of the repair. Without proper materials, even the best techniques may fall short. Thus, understanding the various options available helps you make informed decisions. Gathering high-quality materials not only simplifies the repair process but also provides a better finish, minimizing the visual impact of the damage. Below, we outline the essential materials you will need for the task.
Materials Needed for Filling Cracks

To successfully tackle the repair of a cracked phone screen, it’s imperative to gather the appropriate materials beforehand. Utilizing the right types can make a significant difference in the outcome of your repair. Here’s a list of some common repair materials:
- Epoxy resin: Known for its strength and durability, making it a preferred choice for repairs.
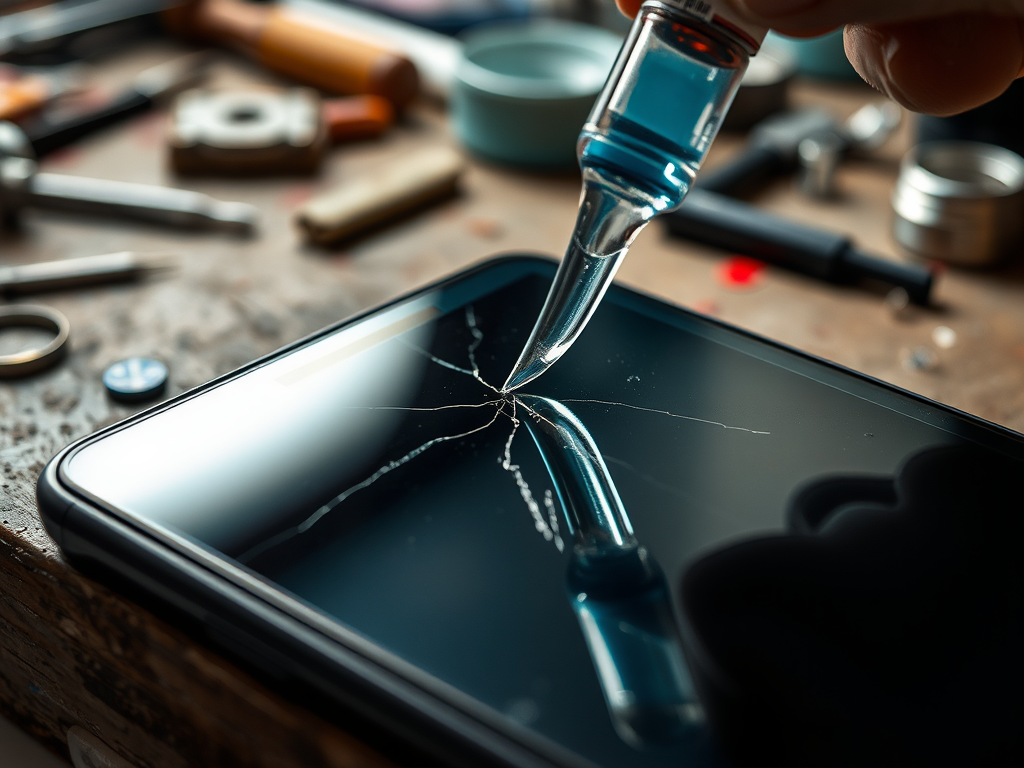
- Super glue or cyanoacrylate: A quick-fix option for minor cracks that are easy to apply.
- Clear acrylic sealant: Perfect for achieving a polished and smooth finish post-application.
- Screen repair kits: Often equipped with specialized compounds tailored for phone screens, making the repair more efficient.
Aside from the repair materials, you will also need certain tools to aid in the application process. Using the right tools ensures that you can control the filling technique and achieve the best results possible. Below is a list of essential tools required for the task:
- Plastic scraper: Essential for spreading materials into the crack evenly and controlling the application.
- Microfiber cloth: Required to clean the area around the crack thoroughly before any repair work.
- Tweezers: Handy for removing any small fragments of glass, should they be present in the crack.
Techniques for Filling Cracks

With your materials and tools in hand, it’s time to delve into the various techniques for effectively filling those cracks. Each crack may require a specific approach, depending on its size and depth. Understanding these techniques can significantly enhance your repair results. The first step before applying any materials involves prep work—a crucial phase for a successful outcome. Properly cleaning and preparing the cracked area can lead to better adhesion and, consequently, a more durable repair.
Surface Preparation is essential for maximizing the effectiveness of the filling materials. Begin by using a microfiber cloth to thoroughly clean the screen. Removing dirt, oil, and debris will allow for better bonding of the repair compound. If any sharp edges are present around the crack, gently smooth them with a plastic scraper. This step will not only help the filling materials adhere better but will also improve the safety of the device while you work on it.
Now that your surface is prepared, you can proceed to apply the filling materials using various methods. Follow the application guidelines carefully, as they can differ based on the material you are using. Below is a table comparing common materials and their application techniques:
| Material | Application Method |
|---|---|
| Epoxy Resin | Mix components, apply into the crack, then smooth out. |
| Super Glue | Apply directly into smaller cracks with caution. |
| Screen Repair Kit | Follow instructions for applying specialized adhesive. |
After applying the filling materials, curing and finishing touches are necessary to achieve a complete repair. Allow adequate time for the materials to cure, which varies by product. Generally, you should refer to the manufacturer’s instructions, as this can range from a few hours to overnight. Once the curing is complete, use the plastic scraper to remove any excess material, smoothing the area for a neat finish. Finally, wipe the screen with the microfiber cloth to restore its clarity and ensure a seamless look.
Conclusion
In conclusion, the ability to repair cracked phone screens is a valuable skill that can save you from incurring unnecessary expenses. With the appropriate materials, tools, and techniques, you can effectively address screen damages and enhance the longevity of your device. Repairing your phone’s screen not only boosts its functionality but also elevates its appearance, allowing you to enjoy a clearer display without the distraction of unsightly cracks. Embracing these DIY methods empowers you to take control of your phone’s maintenance, ultimately leading to a more sustainable approach to technology usage.
Frequently Asked Questions
- Can I use regular glue for screen cracks? Regular glue is not recommended as it may not bond well with glass and could leave visible marks.
- How long does it take for the repair materials to cure? Cure times can vary; follow the instructions on the specific product you use.
- Will a DIY repair affect my warranty? Performing a DIY repair may void your warranty, so it’s advisable to check with your manufacturer first.
- Can I prevent future cracks? Yes, using a tempered glass screen protector and being cautious about where you place your phone can help prevent future damage.
- Are there professional repair options? Yes, many service centers offer professional screen repair services if you prefer not to attempt it yourself.